A couple of weeks ago I wrote about the details of my home made wind tunnel and I wanted to add some recent modifications I made to the smoke generator system. The smoke generator that I am using is a Halloween fog generator and I modified it by attaching a hose to the outlet (and rewired it!). There are some details about that in THIS post. I had a problem with that setup because the smoke (or fog if you want to call it that) coming out of the generator was hot and it melted the plastic tubing that I had attached to the generator. Check out the post above that I linked to for details. A second problem was that the smoke was being blasted right through the wind tunnel in bursts. I only had a few seconds to make an observation with smoke! Another problem that I had was the liquid that is used to make the fog was condensing in the tube that I attached to the output and that condensed liquid was filling the tube and creating back pressure. The tube was essentially being blocked by the condensed liquid, getting hot and finally burst. I decided that I wasn't going to run this smoke system any longer without addressing those issues (and cleaning up my garage).
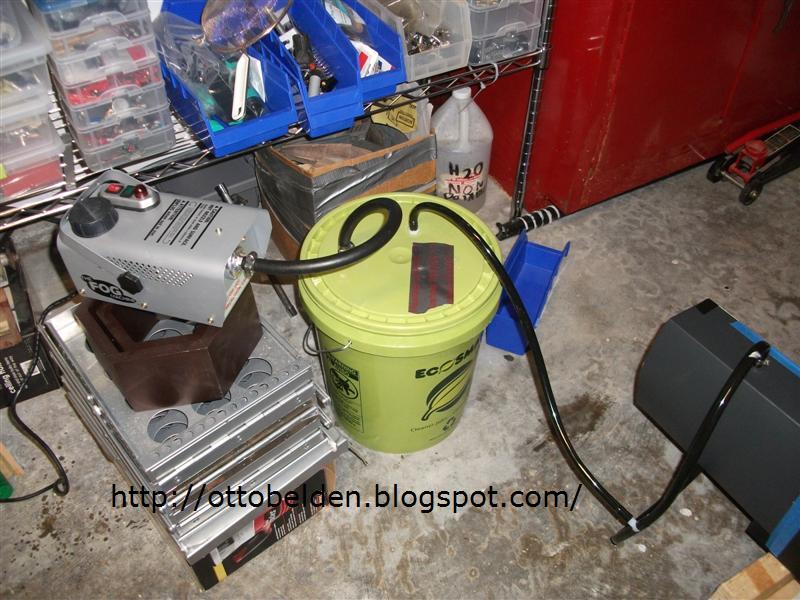 |
| Smoke Generator Accumulator Tank |
What I came up with is shown in the picture above. I got a 3 gallon plastic paint bucket and attached a couple of barb fittings to the lid. On one of the barb fittings I ran some 3/8" fuel line hose from the smoke generator and on the other fitting the plastic hose feeds the wind tunnel. You can see the wind tunnel in the lower right corner of the above picture.
The idea here is that the smoke generator is on a platform higher than the bucket. The hot smoke will first travel through the fuel line which is rated at a much higher temperature and pressure rating than the tube that I was using the first time. Because the trip from the smoke generator to the bucket is downhill condensing liquid should accumulate in the bucket. Hopefully the bucket will also be filled up with smoke and can supply the wind tunnel with a more continuous and even supply of smoke allowing for longer observations. The bucket should act like an accumulator tank in a hydraulic system, at least that is what I am hoping.
This was a pretty straight forward modification and didn't take that long to set up. What did take a long time was cleaning up the garage to the point that I could actually do this. I had a few weeks worth of junk that I had to disposition of and either save or toss.
 |
| Paint Bucket Lid |
There was only one slight problem in drilling the holes in the lid of the bucket. The first hole that I drilled split the top of the bucket a bit. I was surprised by this because I have drilled a lot of holes in paint buckets over the years. The only thing that I can think of is this is a "green" bucket made from recycled materials and soy additives or who knows what and it's a bit more brittle than the old school white plastic buckets that have been around for years. Not too big of a problem, I sealed up the cracked hole on both sides with aluminum HVAC tape.
The next two holes I drilled way undersized and very carefully then filed them out so that I could screw in the 3/8 barb X NPT fittings. I have a bit more work to do on a new Plasma Actuator shape that I want to try in the wind tunnel then I'll give this new smoke system a test run.
No comments:
Post a Comment