Links to stuff on this blog

Use the Site Index of Projects page link above for an easier way to find stuff on my blog that you might be looking for!

Sunday, July 25, 2010

Homemade Schlieren Photography Setup with DIY Optics

I'm not an optics or photography expert but I thought it would be fun to try and make a Schlieren Optical setup with my son. The main reason I tried to do this is the pictures look really really neat like the below picture we took of a candle. I also thought it would be a good summer science project for Otto Jr. We had to do candle pics because that seems to be the quintessential picture that everyone takes!!
  
Our first Schlieren Photo of a Candle Burning
  
From what I know Schlieren optical systems let you see and photograph differences in fluid densities by using refraction of light. Refraction happens when the light passes from one medium (like air) of a given density into another medium (like water) of a different density. The most obvious example is looking at something that is partially in water and partially in air because air and water have very different densities. The amount of refraction or 'bending' caused by the 2 different densities is the refractive index. If you look at a straight stick partially submerged in a swimming pool or a straw in a glass of water they look bent because of refraction. In my setup it's different densities of air that are causing the refraction but it's the same principle.
  
Click below to read more about our first Schlieren setup!

Saturday, July 17, 2010

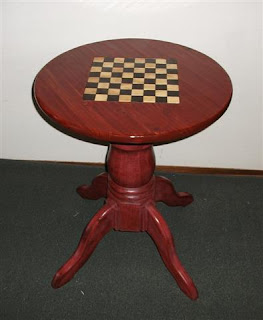
Homemade Chess Gaming Table Update - It's done!!!

This has been a rather long project in the making but a satisfying one now that it is done. For a recap HERE and HERE are a couple of the previous posts about it's construction. As I mentioned in those posts this was a table base that was part of a dining room table that I had no room for and decided to scrap. My son and I used paint remover to strip all the paint off the base and later we found a nice unfinished table top at a garage sale.
  
 
Click below to read more about the table! 

Saturday, July 10, 2010

US Cyber Command Seal and the Secret Code (sorta)

Recently the United States Cyber Command made the news when they announced themselves to the world and unveiled their official seal. There is a write up in Wikipedia HERE that includes a picture of the seal and a description of who they are and what they are going to do. Usually news like this isn't something that I would write about in my blog but I thought I'd make an exception in this case because many friends have been asking me about specifically the "secret code" in the Cyber Command seal.
 
The hexadecimal code in the seal is what really made the headlines because it immediately got people to put on their tin foil hats and start talking about government conspiracies and hidden meanings. There was even a contest offering a prize to the first person to 'decode' it all. In one of the news stories the Commander of the Cyber command said that the code was an MD5 hash of the units mission statement but he seemed a bit vague about it and didn't come right out and explain why it's there or what it's meaning might be. He even indicated that it might not be the entire mission statement but only part of it, but which part? Obviously only the nefarious world domination part of course.
 
Click below to read more about the Cyber Seal!

Sunday, July 4, 2010

Chess / Checkers Table Update

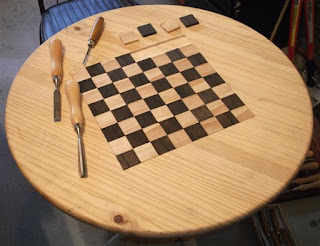
This week I have had more time to work on the Gaming - Chess and Checkers table that Otto Jr. and I am making. I wrote a bit about this table last week HERE and in a couple of other posts but to summarize this table is made from an old table base and a salvaged table top. We decided that it would be fun to  not only build a table but to try and inlay a playing field into the table. The obvious and probably the best way to do this would have been to get some dark and light colored wood and glue it together into a laminated block like a butcher board then glue the table pieces around it. Once that was dome we could plane and sand the whole thing flat and have a nice gap free smooth surface for the table top. But because when one is working with salvaged stuff and making it up as you go along along that isn't what we happened. Last week you may remember that we bought the table round blank at a garage sale then cut up some 1/4 inch thick by 1-3/8 pine finishing board into 64 square pieces. Last week we applied a clear coat to 32 of them and stained the other 32. The dark stain is a Minwax Jacobean color and the pieces were soaked to make them nice and dark. The clear coat was Minwax Polyurethane high gloss clear.
 
Since then I used a router to cut out a squarish area in the center of the table and cleaned it up with some wood carving chisels. I intentionally undercut the size of the hole with the router so I could because it is less precise and used the chisels to get in close and make a nice fit for all the playing field pieces. I decided to cut the playing field hole at an angle to the grain and lamination of the table top to give it some visual interest. Also for the same reason the grain of the light and dark square pieces of the playing field are alternating at right angles to each other.
 

Click below to read more about this table!